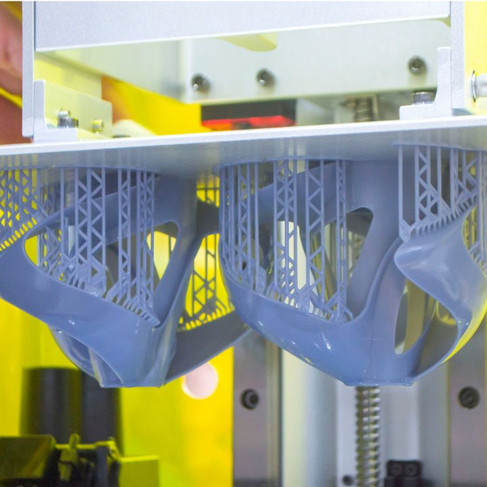
Resin printing, the name comes from the material used in the printing process that is liquid photosensitive resin. This process is best suitable for jewellery casting, manufacturing of dental aligners, idols and many more products. This method of 3D printing gives superior surface finish compared to FDM (Fused Deposition Modelling) and SLS (Selective Laser Sintering) processes.
Let's get you familiarised with this resin printing process in 7 easy steps.
1. Make a 3D model
This is one of the crucial steps involved in 3D printing, making 3D Computer Aided Design (CAD) models using various CAD software. Free-form designs can be made in software like Zbrush, Blender, Autodesk Maya etc. Jewel CAD is used for making jewellery designs which are later used in making moulds. Oral scanners are used by dentists to scan your oral cavity to make aligners. The design needs to be considered for additive manufacturing processes. Almost all Resin prints require support for the base layers.
2. Convert to STL
All mechanical design software support conversion of solid part files to Standard Triangle Language or Standard Tessellation Language (STL) file format. Here the solid file is converted into triangles. Here it is important to note that resin printers support high resolution prints ranging from 8K, 9K, 12K , 14K resolution LCD screens. These require a high resolution .stl file for smooth surface finish. DLP printers use a projector, hence have a higher resolution as well as have longer life than LCD Printers.
3. Slice in Slicing Software
Once the file is converted to STL format, it can be imported to a slicing software. Open-source software, like ChituBox, Lychee Slicer, are commonly used. Secondly, machine manufacturers provide proprietary software for their machines which contain the optimum parameters for the printer . The resin parameters have to be altered for every resin used with the printer. Objects can be hollowed out to reduce weight, holes need to be provided for the resin to be removed from the hollow print. The slicer software estimates duration of the print and weight(in grams) of resin required.
4. Cleaning the Resin
After the print is completed, the print needs to be removed from the print platform with the help of a metal spatula. Here excess resin on the completed drips into the resin vat. Also if the parts are hollow the resin inside the hollow part needs to be drained out from the hole made while slicing. In case holes were not provided, a small hole can be carefully drilled in the part after printing. As the resin is brittle, cracks can be formed while drilling. The resin which is uncured can be used later.
5. Washing
The part is dipped in a container of Isopropyl Alcohol solution(IPA Solution) or Acetone solution. The part needs to be fully submerged in the solution. The Wash machine has a magnetic stirrer with which the solution is stirred. This process removes any uncured resin from the surface of the part, as well as uncured resin inside the part if the part is hollow. This washing process enables supports to be detached easily from the part.
6. Curing
The resin can be said to be semi-cured in the printer, which needs to be fully cured later. The part can be kept in direct sunlight which contains UV (Ultraviolet) light which cures the resin. This process of curing in sunlight can be made faster by using LEDs (Light Emitting Diode) which emit harsh UV light on the part. The wavelength of the light is mentioned by the resin manufacturer and usually ranges from 365 to 405 nm (Nanometres).
7. Post processing
After the resin part is completely cured, the parts surface becomes smooth and hard. This can be painted to give it a good appearance. Resin prints can be directly used for making moulds as the surface requires minimum to no post processing.
In conclusion, resin printing stands out for its precision and high-quality surface finish, making it indispensable for crafting intricate objects such as jewellery and dental aligners. From initial design to final curing, each step ensures optimal results, offering efficiency and versatility in additive manufacturing for diverse industrial and artistic applications.


コメント